Folks who visit our studio often wonder just how we go about designing and creating our projects. If they see our modern computers and computerized tools they assume we just select a picture and then press a magic button to make it happen. It doesn’t work quite like that.
While we certainly embrace and use modern technology and tools it still takes a great deal of skill and experience to pull off even a fairly simple project. Over the next while I’ll be posting a step by step, showing how a typical (but small) project comes together. It will be worked on during our Sign Magic Workshop as a demonstration piece. We have tried to incorporate as many techniques as we can. The piece is to be a newspaper box and directional sign for our driveway.
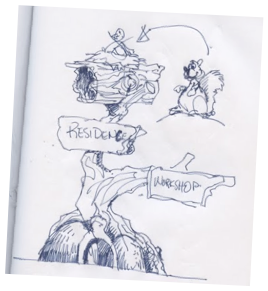
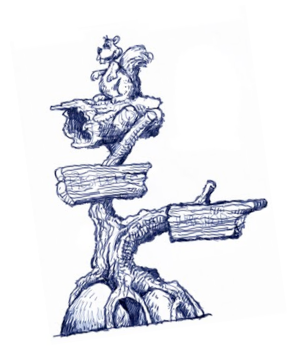
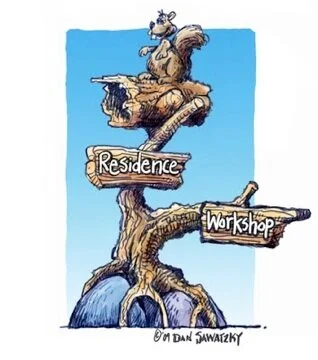
It always starts off with an idea of course. These ideas are generally worked out in my sketchbook in very rough form. the first drawing was done using a rollerball pen (my favorite). I didn’t spend a lot of time on it - five minutes at most. I showed the scribble to Janis for her input and approval - then scanned it into my computer for the next step. Using a digital drawing pad and Adobe PhotoShop I straightened it out, cleaned it up and moved the squirrel to the top instead of the bird. Then in about 15 minutes I reworked the sketch, freehand, using the digital drawing tablet instead of real pen and paper. I then added in color and the sky background. The client wouldn’t normally see the concept art until this stage.
Now the real fun begins... building the piece. My report on that process will be saved for the next installment.
-grampa dan