A welcoming area

The front porch area is coming along amazingly. It makes me laugh every time I walk by. Peter is welding up a storm, now working on the fifth tree in that area. There are only four trees left to go on the porch, carport area. Brando, Hailey and now Matthew are applying the galvanzied mesh as fast as they possibly can. And with each piece the forest of trees is taking form. The curved beams and the bottom rock work will flow together seamelssly creating pure magic when we are done.

porch metal magic 2.png
porch metal magic.png

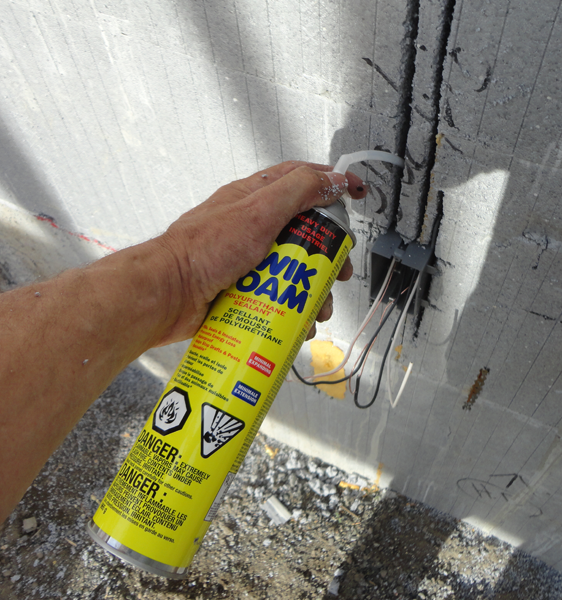
It was also time for a little more infrastructure before we close up the trees on the porch. Electrical wiring for the septic system and some plugs in the carport area needed to be wired into the house. Once the mesh and concrete are in place it will be too late. Our electrician C&S electric was on top of it and sent out one of his guys to do the task. 

c and s truck.jpg
electrical in post.jpg

Now we can close things up and go full speed ahead!

-grampa dan

A ROOF!

Today was one of those days where progress seemed huge! The boys were busy nailing plywood to the trusses. They worked hard and got a lot done.

One side of the roof is now largely done. It sure changes the look of things with the roof now looking huge. The good sized overhangs and angled facia board provide a very stylized view... very different from the norm. The eyebrows have yet to be finished and sheeted and that will make them stan out a lot more. The front gable still needs a lot of work but it is coming along nicely!

sheeting on roof back side.png

Inside the roof sheeting changed things in a dramatic fashion as well. It will be fun to finish off this area. We have some pretty cooth things planned. 

roof going on inside view.png
pstairs roof on.png

Stay tuned for more developments...

-grampa dan

Pulling some wire.

As with every project we have to do more mundane steps to take care of infrastructure before we can get to the more creative stuff that will cover it all up.

It is a little early for wiring through the house but we have to install the plug boxes into the outside walls so we can put on the expanded lath and then begin the sculpted concrete. When we build with LOGIX ICF (insulted concrete forms) we have to use special methods to do things like wiring. Slots are cut into the foam and the wire is pressed into place. Boxes are done in much the same manner. It is actually easier than doing it in a regular stud wall. I bought a used electric chainsaw back when we built our shop (using the same method) nine years ago. I welded a piece of quarter inch pencil rod onto the end so the saw could only go 3 1/4" deep (the foam is 3 1/2" thick.

chainsaw with bar.png

I could then cut a 1/4" wide slot into the foam insulation with the chainsaw.

cutting foam.png

Normal LOOMEX type wire is used. We push it into the back of the groove we just cut using a paint stir stick. This makes it well out of the way of damage from any wayeward screws.

pushing wire into foam.png

Friction holds the wire in place nice and tight. Rectangular holes are cut for the boxes and they too are pressed into place. A little PL300 holds them securely without melting the surrounding foam.

box in foam.png

Then it is time to add some insulation back into place. A can pf spray foam does the trick in a hurry.

spraying foam.png

As the foam expands it bubbles out a bunch but that is no worry for we'll allow it to harden and cure and then tomorrow we'll trim it off flush with the LOGIX ICF blocks. 

foam sprayed.png

In a short while I had installed the plugs on the porch and front of the house, with the wires tucked in to the top of the walls and then stapled neatly into the trusses all the way back to where the electrical panel would eventually be. Now it is time get back to putting up the galvanized mesh on the outside of the house and get on with the theme work.

-grampa dan