30 lbs. High Density Urethane

You may have noticed that we almost always use 30 lbs. high density urethane (HDU). We are sometimes asked why we use such a heavy board (30 lbs. per cubic foot) — after all, a 15 or 20 lbs. board is very easy to work by hand (and a little cheaper). In fact, when we are building a scale model we sometimes use 4 lbs. HDU — we can sculpt it using our bare hands!

In general, HDU (whatever the brand) is a versatile material. It cuts easily, there is no (wood)grain to contend with, it hold’s paint well, and it is very stable. But there is a downside too — it has no structural strength and the lighter weights are downright fragile!

When we first looked at HDU, 15 and 20 lbs. board was the industry standard. Then by chance, at a Letterhead meet in Minnesota, my father met Kellie Miller from Coastal Enterprises (the makers of Precision Board brand HDU). Dad expressed his concern at the fragility of HDU. Kellie just smiled at him, dug under the display table, and pulled out a sample of 30 lbs. Precision Board — “nobody uses this,” she said. At the time, Coastal Enterprises was the only company to offer such a heavy board (although it is more common now). In fact, we sometimes use 40 lbs. HDU if the project needs to be especially durable.

30 and 40 lbs. HDU routes at the same speeds as the lighter weights. Glueing pieces together is no different. Mind you, carving 30 lbs. HDU by hand is a challenge, we prefer to use an air powered die grinder — it is much easier than doing things with manual tools!

We keep a few small samples of the various weights of Coastal Enterprises’ HDU on hand. (HDU is rated by the weight per cubic foot and ranges from an impossibly light 4 lbs. up to an ridiculously heavy 90 lbs.) When we are discussing materials with a customer we sometimes pull out our sample of 18 lbs. board. We run a fingernail into it leaving a very visible mark every time. We explain that this is the material many sign shops use for a dimensional sign. Then we hand our sample of 30 lbs. board to the customer — they can't leave a mark on it... It speaks to the quality of our work.

Quality materials (and tools) are critical for quality work. And, in the end, our labor and expertise are worth far more than any other portion of a project. Skimping on materials risks damaging our long term reputation (and the value of our expertise), that’s why we use 30 lbs. HDU.

Precision Board.jpg

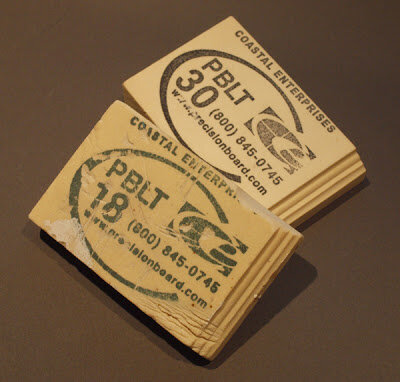
The 18 pound board in the picture above bears witness to the abuse it has taken, over the years, for the sake of a sale.

Nag's Head

This small pub sign measures just over 4 feet wide and almost 24" tall. It features a horse's head that protrudes from the sign.

First, we create the vectors for the sign itself and import them into EnRoute. The central “barrel head” is a separate layer which will be glued on after routing. The horse’s head will be routed in multiple slices and glued back together after routing before being mounted to the sign.

sign vectors.jpg

The first item of business is to create the barrel head. It’s a simple oval with a bitmap woodgrain applied. Next we create the stave ends by making them as 1.5" tall reliefs and then merging them to the barrelhead. A smaller raised oval provides a mounting point for the horse's head.

plain oval.jpg
bitmap on oval.jpg

The banner reasonably straightforward. The layers of the banner are raised to different heights and merged together (along with the oval for the barrel). We also create a raised relief around the lettering before applying a bevelled relief to the lettering.

sign components.jpg

We purchased a great looking horse's head as a STL file — we will make the horse a little more “naggish” with some hand sculpting after the sign is assembled.

horse head stl file.jpg

The horse file is sized by eye and then rotated to suit the sign. Next we create a rectangular “zero height relief” and “merge lowest” to cut the back of the horse’s head off. Using the slice tools in EnRoute and a zero height relief we cut the bottom plate off the horse's head. Then we slice it again to fit into a 1.5" sheet of Precision Board HDU.

horse head in enroute.jpg
horse head with zero height layer.jpg

We won’t worry about the missing small pieces of mane — we can quickly recreate these pieces with some sculpting epoxy after assembly.

horse head layers.jpg
horse head sliced.jpg

We need a copy of the two layers (flipped) for the back side of the horse. Then we nest everything together and send them off to the CNC router.

ready to route.jpg
nag sign on the router.jpg

We use Coastal Enterprises PB Bond 240 (a single component glue activated with water) to glue everything together. We use screws instead of clamps because the pieces are so irregularly shaped. The screws will come out later before we begin the sculpting process. As we sculpt we will modify the horse’s head to give it a little more of a “nag” feel.

nag sign glued.jpg

We will also add the woodgrain to the slat ends with a die grinder. We could have easily programmed the woodgrain into the ends and let the CNC router do this work but, because its a small area, doing it by hand won’t really take much time.

Dinosaur Desk

The dinosaur desk makes extensive use of the CNC plasma cutter. Dan’s concept sketch shows a dinosaur fossil supporting a glass tabletop.

desk concept.jpg

Our reference material for this particular project included a child’s plastic T-rex model kit. The instructions for the model proved very helpful when building the files for the individual bones. The vectors for the bones were created in EnRoute and, amazingly, fit on a single 4' x 8' x 1/2" thick steel. We ended up with about 312 pounds of dinosaur pieces — it was quite the pile of parts!

plasma cut.jpg
pile of bones.jpg

After we had sorted them and arranged them in order of size it was time to start welding. We used a 1" steel rod — putting it though our hydraulic press to bend it to the right shape then arranged the plasma cut parts over the rod. The easiest way to align the parts was to build the dino flat on his back.

dino on table.jpg

Once the rib cage and tail of the T-rex were welded up we used the chain hoist to lift it upright. An adjustable stand at each end held things steady while we lined things up. From here on in we would weld up the various smaller assemblies on the bench and then fasten them to the large piece permanently.

dino in chains.jpg

After a little grinding the table is ready for its glass top.

finished dino.jpg

For good measure we made a matching coffee table — it measures 20" x 28" x 17" tall.

coffee table frame.jpg
coffee table frame 2.jpg

It's welded solid and plenty heavy - perfect for putting one's feet up when relaxing!

dino desk.jpg

Once the steel has been allowed to patina with rust and the glass top is in place the desk is ready for our client. The desk weighs in at a hefty 360 pounds.

dino desk 3.jpg