Name Tag 004: Dave

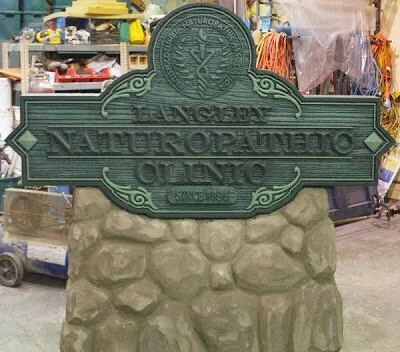
Dave owns a CNC router — he uses it to create cabinets and doors so we designed his workshop name plaque as a door panel. We designed the vectors in Illustrator.

dave lettering vectors.jpg

We then imported the Illustrator file into EnRoute and also imported a cartoon woodgrain bitmap (from our Texture Magic: Classic Collection, of course). We used the drawing tool in EnRoute to trace each board to make the door’s outline.

dave panel 1.jpg

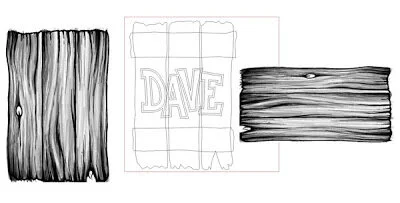
The hinge vectors were made using these tools as well. After creating the reliefs for each board we applied the texture bitmaps. Each component was created separately then merged as a last step.

dave finished.jpg

Our CNC router made quick work of the file we created in EnRoute.

dave routed.jpg

Name Tag 003: Jonathan

Jonathan’s name plaque makes use of the 'rope trick'. This is a simple extrude function in EnRoute with unlimited possibilities... one being a rope border. The vectors are simple, just a series of ovals around Jonathan’s name. The rope will follow the centre oval.

jonathan vectors.jpg

Once we import the Illustrator vector file into EnRoute we will add an outline around the lettering. We will also add another oval, slightly offset from the innermost oval — we will use this new oval to form a dome in the centre. The small shape at the bottom of the above picture is the cross section of our rope. A weave bitmap from my Texture Magic: Classic Collection will be used to create the background texture. If you look close at the picture below you can see the vectors underneath the bitmap. We have sized and positioned the bitmap texture so the weave is even on all sides.

jonathan weave.jpg

The rope was extruded at a mesh, then positioned on the file before being merged to the relief. The mesh is red in the screen capture below.

jonathan rope.jpg
jonathan rope merged.jpg

We will create the border around the lettering as a separate relief, then modify that relief using an oval to make it domed like the plaque itself. We can then position it checking its placement from different angles to make sure it rises above the other parts. Once we are satisfied we will merge it all together. Tool pathing is done with a 3/8” ball nose bit to rough it out, followed by a final pass with a 1/8" ball nose bit and an 80% overlap.

jonathan finished.jpg

Finally, we can send it to the CNC router to be cut.

Naturopathic Clinic - Part 5

The first step when painting is applying the primer and then the coloured base coats. The dark green border exactly matched the client’s building. Dan painted the woodgrain a lighter, custom mixed shade. Over this he would later add two layers of glaze to highlight the grain.

painting green.jpg

While the paint cured he sculpted the rock work with fiberglass-reinforced-concrete (FRC). The needs to dry for a minimum of three days before being painted to look like rock.

base colors done.jpg

Meanwhile, Dan painted the pinstripes and ornaments using the light green colour he has used as the base colour for the woodgrain.

sign finished.jpg

Dan painted the rocks with the blended base coats to colour the stones and then using an undercoat gun with low air pressure (30 lbs. or so) to create a speckled effect reminiscent of granite. Once the paint was dry, he painted in the grout lines between the rocks with a small brush.

While Dan was waiting for the various coats of paint to dry on the rocks he painted on the gold size which is clear like varnish. He used a slow size this time and it took 12 hours to set up enough to apply the gold.

Next he carefully applyied the 23K gold leaf. The dark greens of the sign make the gold feel very rich. The sign sparkles even in the artificial light of the shop — it should look spectacular out in the sunlight!